Working with serial console is important for at least two reasons. First one is to allowing direct control of your embeded device from you computer through USB cable and the second is debugging of your application. There is nothing better than seeing on your terminal every message that was printed out on your board [1]. You can visualise in that way program flow, errors and every value that is important to your calculations. Let’s see how to do it.
Hardware
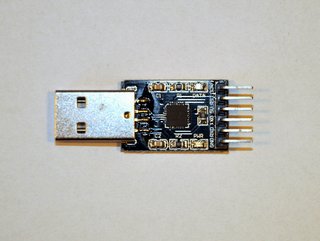
First of all, if your board does not come with USB to UART converter you will need some external controller. That devices are also called USB Serial Console cable. We will be using one that is based on CP2102 chip from Silicon Labs [2]. You can find plenty of them on eBay. There are other options too, so just check them out and pick one that you like.

Software
Driver
If you have this one or other which is based on CP210x download and install CP210x USB to UART Bridge VCP Drivers.
You need to restart computer after installing that driver. You can check that your driver recognise you serial console with:
> ls /dev/cu.*
/dev/cu.Bluetooth-Incoming-Port	/dev/cu.Bluetooth-Modem		/dev/cu.SLAB_USBtoUART
Console
To communicate through serial console we will be using just terminal program “screen”. It is not maybe the most convenient way but for our needs it is just enough. There are plenty of other possibilities that you can find in internet, pick one that you like the most [3].
With screen you can do:
> screen /dev/cu.SLAB_USBtoUART 9600and than communication window will be open. To exit that window you need to press ctrl+a & ctrl+\ key sequence. The default setting for a Serial connection on the mbed Microcontroller is 9600 baud.
Wiring up
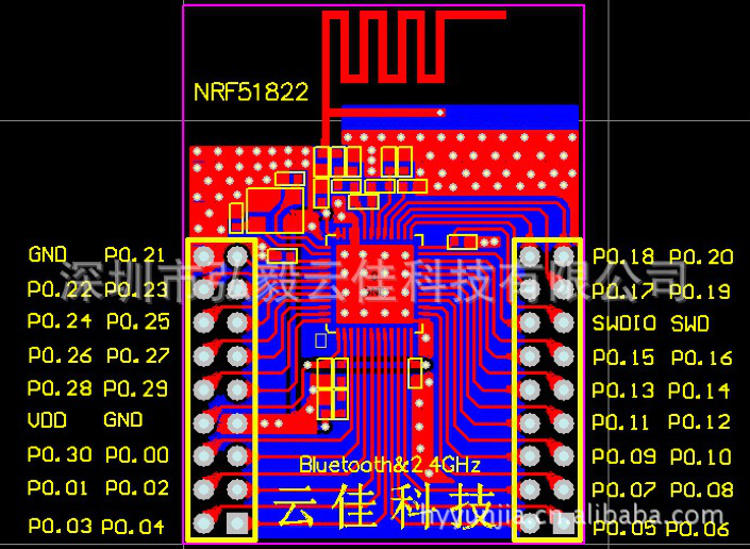
For the standard nrf51 platform pins are configured like that:
nRF51822 module    ST-LINK/V2
common ground:       GND <-----------> GND
supply voltage:      VDD <-----------> 3.3V  //don't connect if you already have one
TX:                p0.09 <-----------> RXD
RX:                p0.11 <-----------> TXD
To make it easier for you this is pinout diagram of Core51822 board.

Simple program
We’ve provide you with some simple program to test communication between computer and your device. What does this program do is just print some text messages into the console and then wait for input. It just go like that in the loop.
#include "mbed.h"

#define BAUD_RATE 9600 //default baud rate

char name[256] = {0};

int main() {
    //Configure boud rate
    Serial s(USBTX, USBRX); //default for nrf51 is p0.09 p0.11
    s.baud(BAUD_RATE);

    while(1) {
        printf("Hi!\r\n");
        printf("What is your name (input name and hit enter)?\r\n");
        scanf( "%s" , name );
        printf("Hi %s!\r\n",name);
        printf("It was nice to meet you!\r\n\r\n\r\n\r\n");
    }
}
You can modify baud rate to whatever you like or just drop that first secion. List of supported baud rates is: 110, 300, 600, 1200, 2400, 4800, 9600, 14400, 19200, 38400, 57600, 115200, 230400, 460800, 921600 [4]. Last two did not work for us at the moment.
Running example
You can checkout this program at Icarus Sensors / Serial Console repository and directly import to your mbed compiler.
After downloading your binaries flash it to your processor, open terminal and reset your device back in telnet window. For more details you can check Starting with nRF51822.
Sample output from terminal with the screen running can be:
> screen /dev/cu.SLAB_USBtoUART 9600
Hi!
What is your name (input name and hit enter)?
Hi Marek!
It was nice to meet you!
That was it. Have fun and let us know how do you find this instructions.